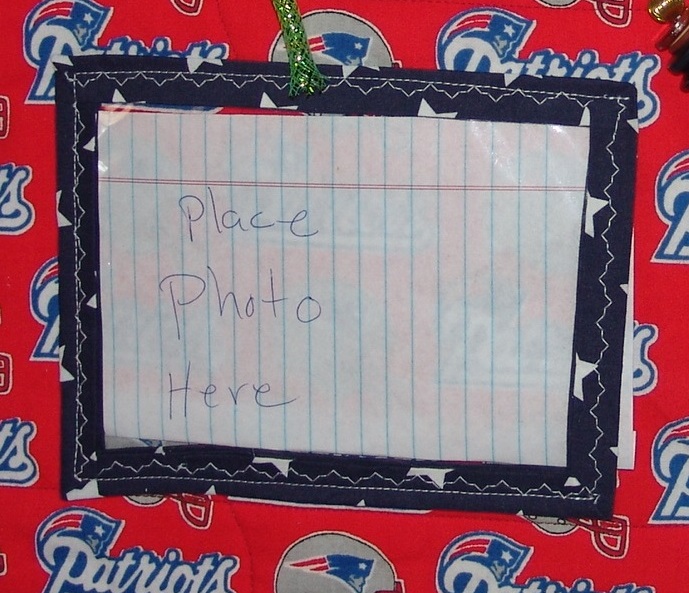
I made a video of how to make these vinyl photo sleeves but my site plan is free and to add the videos I will have to upgrade.
I use the same process for my quilts as my vinyl sleeves, so I will be showing pictures of how I add a binding to a quilt. Note I only sew my binding once, I fold my binding,( I make shown below), over the edge and sew it on. Since the raw edge is close to the center of the binding I do not have to worry about missing raw binding edges (99% of the time) when I sew on bindings.
You will need:
One 2″ X 45″ cotton strip of fabric of your choice. the fabric needs to be long enough to go around the whole piece of vinyl.
One piece of clear vinyl mine was a 5″ x 7″
One 2″ bias tape maker
Matching thread
One piece of fabric to use under the vinyl to keep it from sticking to your machine
One well running sewing Machine
Scissors and
and a project you want to sew the vinyl sleeve onto
- First you make cut a 2″ x 45 ” strip of fabric. I use a 2″ bias tape maker I found at Jo-Anns.
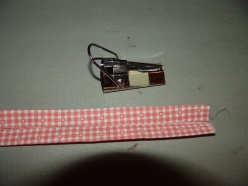
2. I run it throw the bias tape maker so the outer sides almost come to the center like in the picture.
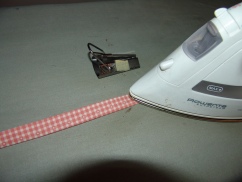
3. Then I press it in half but leave a 1/32″ of the back showing.
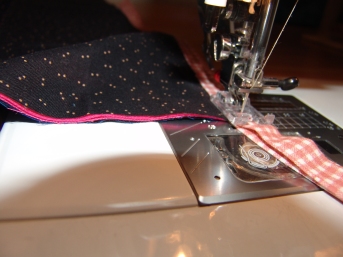
4. I set my machine to a decorative stitch that doesn’t have too many tight stitches other wise it would cut the vinyl. I like a wide stitch to make sure I tack the back and front at the same time.

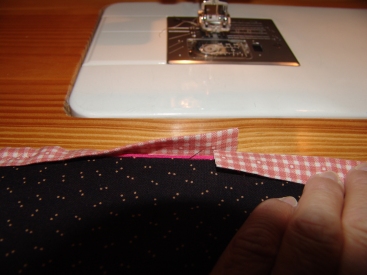
5. I place my binding over the edge of the quilt or vinyl almost to the center, but not touching. I leave a three inch tail before I start sewing so I can have binding fabric to end with.


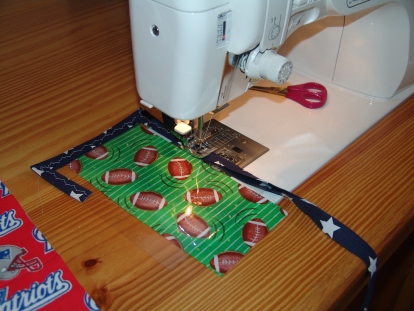
6. Here is the trick for me to sew on clear Vinyl is to put another piece of fabric under the vinyl butting up to the sewing foot. Make sure its not in the path of the needle. I am not sewing that green foot ball fabric to the vinyl. Just the navy with stars binding in the picture below.

7. Then I sew all the way to the corner and stop at the very edge of the vinyl or quilt. Stop remove the vinyl/quilt cut the threads.
8. Then do a Cobra snake flare with the fabric.


9. I then fold it back on its self to form a mitered corner. I put a pin where my finger is to hold the fabric and that way I can make a better corner. It takes practice. Once I am happy with my miter I slide the corner in from the back of the foot to make sure I don’t mess up my fold. It depends on how I want my corners sewn will depend on how I start sewing a corner. On my fidget Lap Quilts I do a straight stitch with a back and forth stitch for extra hold. I my reg quilts I just start with the decor stitch.

10. Once I get all the way around the quilt vinyl sleeve I stop 3″ from where I started and back stitch or tack stitch.
11. I trim my end to a 1/4 inch over lap then sew it together. First I turn it to right sides together and use pin to make sure the edges are even. Then sew a 1/4 inch seam.


12. Finger press the seam open and turn back to the folded position. Making sure the binding lays flat on the vinyl or quilt if it buckles make your seam a little wider. if its too tight make your seam smaller.

13. Start sewing with your decorative stitch where you left off to where you started sewing. and your binding is finished.
14. Once you have the vinyl sleeve finish you can sew it onto any project you want. Makie sure you only sew three sides on, leaving one side open to add information.
If this was helpful let me know, if you have any question ask and I hope I can help.
Louise
